
Shanghai chengsi intelligent technology co., LTD
Contact: Mr. Gao
Phone: 17701637746
Phone: 19821311892
Address: no. 265, east street, zhuangxing town, fengxian district, Shanghai
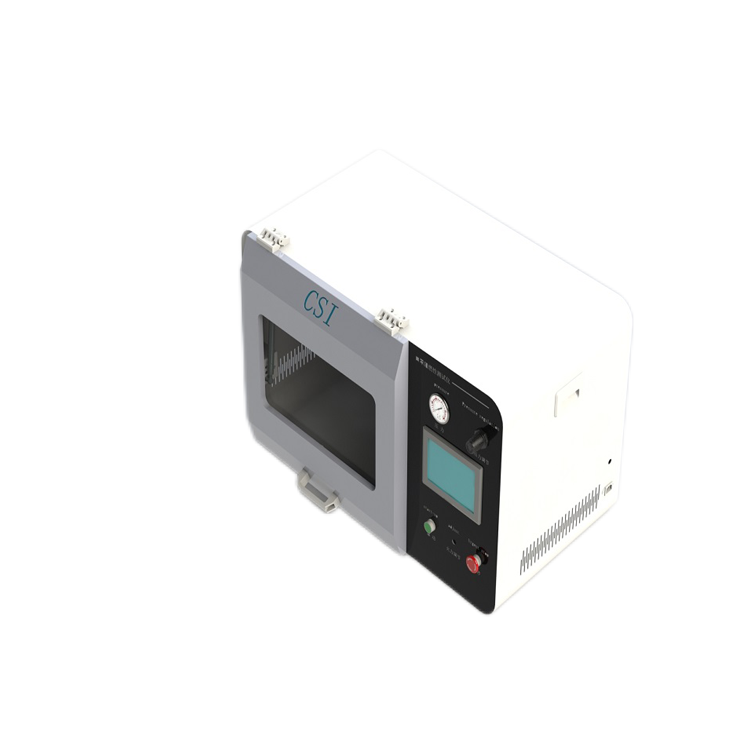
Brief introduction of flame retardant tester for medical mask
Suitable for the determination of flame retardancy of medical masks and all protective masks. It can be used by medical inspection departments, safety inspection departments and scientific research institutions.
1.1 test principle
1. Test the mask with standard energy heat source to observe the burning behavior of the mask. The energy of the fire source is ensured by measuring the height and temperature of the flame.
2. The time when the mask or other sample passes through the fire source is stipulated by the standard, and the action time of the fire source is guaranteed by controlling the moving speed of the mask.
3. The combustion behavior of the sample is measured by flame and flame free combustion of the sample.
1.2 test standards
The flame-retardant performance tester of this medical mask meets but is not limited to the following standards:
Technical requirements for medical protective masks;
YY 0469-2011 surgical masks for medical use.
1.3 composition and use of the instrument
Schematic diagram of instrument structure is shown as follows:

1. Windproof board;
2. Combustion box;
3. Glass doors;
4. Metal head die;
5. High flame rod;
6. Flame height measuring scale;
7. Set screw;
8. Igniter;
9. Residue container;
10. Resistance wire
11. Head mold positioning screw;
12. Thermocouple;
13. Pressure gauge;
14. Control box
Instrument control panel as shown below:
Power supply: closure and cut-off of the main power supply;
Ignition: when pressed, turn on the gas switch and load the heating current of the heating wire. After lighting the flame, loosen it and cut off the heating current of the heating wire;
Flame adjustment: adjust the flow of gas and the height of flame;
Start of igniter and return of igniter: manually control the extension and retraction of the flame, adjust the flame to extend the flame to the test position. After the end, press "igniter return", the flame retract to the ignition position, and automatically cut off the gas source;
Head mould starts and head mould returns: press "head mould starts" head mould turns from its actual position (inside) at a fixed rate, and stops after touching the position switch. After the end, press "head module return", and the head module will return to the starting position;
Afterburning stop: after the rotation of the head mold stops, the timer of "afterburning time" will start automatically, press "afterburning stop" to finish the timer, and the timer of "smoldering time" will start automatically. Press this button to forcibly cut off gas;
Smoldering stop: stop "smoldering time" timing;
Reset: stop and reset the timing display;
Flame temperature: shows the temperature of the flame;
Afterburning time and smoldering time: display the afterburning time and smoldering time of the sample.

2.test
Plug in the power socket of the back cover plate of the instrument to connect the power, connect the air inlet to the propane bottle, open the valve door of the gas bottle to connect the gas source.
Close the front door of the combustion test chamber and place the "power" switch in the "on" position. The power indicator is on.
First make the metal head die tip part down, take a mask on the metal head, slightly hard, snapping his head with the hand mold, directly above the igniter pledge die tip part just when adjusting the height of the igniter head (clockwise ignition head is reduced, the ignition head elevated) counterclockwise tip in the ignition and header at the top mould, a distance of 20 + / - 2 mm.
Press the "igniter return" button to return the burner to the ignition position.
Press the "head back" button to return the head back to the starting position. Press the "reset" button and the instrument will return to its original state.
Press and hold the "ignition" button to adjust the "pressure adjustment" knob of propane medium pressure valve (rotate to increase by "+" direction indicated by the end of the knob, and rotate to decrease by "-" direction) so that the pressure gauge pointer on the top of the instrument box is 20kPa.
At this time, the ignition resistance wire has turned red. Release the "ignition" button after igniting the igniter. When ignition is difficult, please adjust the "flame adjustment" button, clockwise to reduce the flammable gas flow, counterclockwise to increase the flammable gas flow. If the ignition is not successful for some reason, in order to prevent the gas from continuing to enter and causing an explosion, press "continuation of combustion stop" to cut off the gas, and then press "reset" to resume the initial state.
Open the combustion chamber at the front door, with the hand will flame height gauge (40 mm) on the flame front, the flame adjustment knob, adjust the flame height plus or minus 2 mm to 40 mm, after being flame stability, remove the flame height gage, now observe whether the temperature display on the instrument panel is stable in 800 + 50 ℃, if insufficient but by increasing the cylinder pressure reducing valve inlet pressure to adjust, the flame temperature stability in 800 + 50 ℃.
Press the "igniter start" button, the igniter moves to the ignition position, press the "head mold start" button, the head mold starts to rotate, the head mold rotates in place, the igniter stops gas and reset, "afterburning time" automatic timing; After the continuation, press "continuation stop" button; If there is no continuation, press "continuation stop" button directly, and after the end of smoldering, press "smoldering stop" button again, and record the continuation time and smoldering time.
Press the "head mold return" button to restore the head mold to the starting position, open the front door of the combustion test chamber and remove the sample. The test is completed.
Press the "reset" button, the instrument will return to its original state, and the next mask sample will be placed on the metal head mold. At this time, the next test can be carried out according to steps 6-11. If the next test is not required, please turn off the power, unplug the power, take out the residue container, and clean up the combustion residue.
To test the flame resistance of the mask, put the mask on the metal die, loosen the "head die positioning screw", and rotate the die to bring the mask down. Press the "head die start" button and the head die starts to rotate. When the head die is just above the igniter, press the "smouldering stop" button to stop the head die. Adjust the height of the igniter head so that the distance between the top of the igniter and the bottom of the head die is 20±2mm;
Follow steps 6-11 to test. When the material is tested, the desired shape shall be formed by injection molding, compression molding or compression molding. If this method is not feasible, the sample shall be cut from a representative sample of the material. After the completion of production, use fine sand paper to grind the cut surface smooth, carefully remove all dust and particles on the surface. The sample size should be at least 60mm long and 60mm wide (inside of fixture). The first xuan thickness values include: 0.1mm±0.02mm, 0.2mm±0.02mm, 0.4mm±0.05mm, 0.75mm±0.10mm, 1.5mm±0.15mm, 3.0mm± 0.2mm or 6.0mm±0.4mm.
When testing finished products, if possible, the sample should be a complete finished product; If the test cannot be carried out on a complete finished product, you may:
A) cut a piece of the part to be inspected;
B) open a small hole in the complete product to make it contact with the glowing wire;
C) take out the parts to be inspected from the complete finished products and conduct separate tests.
3. Precautions
1. The test must be carried out in the fume hood.
2, the instrument must have a good grounding wire
3. The storage place of instruments and gas cylinders shall be strictly prohibited from pyrotechnics, prevent ignition, and extinguish the samples that are still smoldering after the test in time. Carbon dioxide and other fire extinguishing equipment should be installed.
4. Carefully check the gas pipeline before starting the machine. Gas leakage is strictly prohibited.
5. Operators should have protective clothing and gloves to avoid hand injury or scalding.
6. Exhaust fans should be installed in the workshop to remove harmful gases and replace fresh air immediately after the test.
7. At the end of the test, the gas source must be turned off first. Press and hold the "ignition" button.
8. When the igniter starts, it will stop for some reason. Please press the "igniter return" button.
9. If the air source has been connected, press the "ignition" button and the ignition does not catch fire, please check whether the ignition port is blocked and clear the attachment.
Shanghai chengsi intelligent technology co., LTD
Contact: Mr. Gao
Phone: 17701637746
Phone: 19821311892
Address: no. 265, east street, zhuangxing town, fengxian district, Shanghai